
Lead Info #
The Lead Information page in the Manager panel is the starting point for viewing, editing, and managing all details related to a lead. This section gives managers a complete overview of the lead’s status and allows them to update core information when needed.
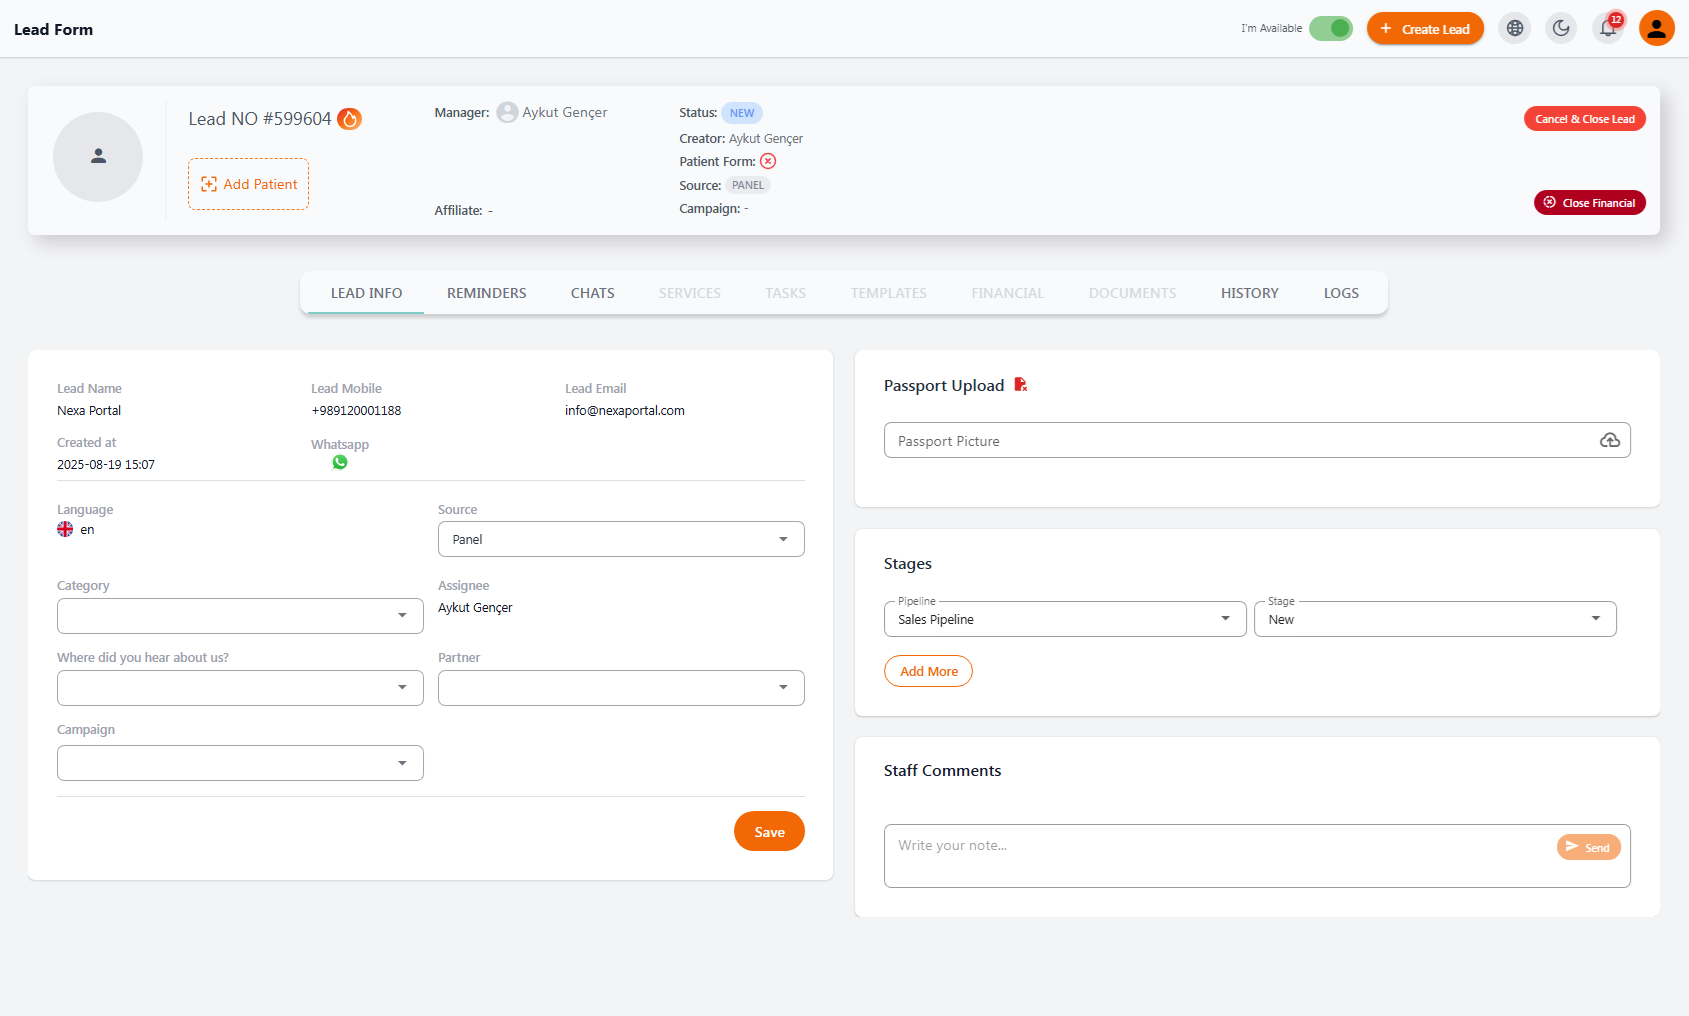
🔍 Core Lead Details #
| Field | Description |
|---|---|
| Lead NO | Unique ID number of the lead in the system |
| Status | Current lead status (e.g., New, Pending, Qualified) |
| Manager | Main person responsible for follow-up |
| Creator | User who created the lead |
| Source | Where the lead came from (Panel, WhatsApp, Chatbot, etc.) |
| Campaign | Campaign associated with the lead (if selected) |
| Patient Form | Linked patient form (if submitted) |
🧾 Contact & Categorization Info #
On the left side of the page, you can view and edit basic lead information:
-
Lead Name
-
Mobile Number & WhatsApp Status
-
Email
-
Language
-
Source
-
Treatment Category
-
How did you hear about us?
-
Partner / Referrer
-
Campaign
-
Assigned Salesperson (Assignee)
🎯 Completing these fields accurately greatly improves lead conversion rates.
🗂️ Sales Stage #
On the right side, you can set or update the pipeline and current stage of the lead.
Using the “Add More” option, you can assign additional stages if needed.
🛂 Upload Passport #
For many treatment or travel processes, a passport image is essential.
This section allows the manager to upload the patient’s passport easily.
💬 Internal Notes #
Managers can write internal comments or reminders in the Staff Comments section.
These are visible only to internal team members.
❌ Close Lead or Financial Case #
At the top of the page, two key options are available:
-
Cancel & Close Lead: Ends tracking and closes the lead case
-
Close Financial: Finalizes the financial part if the process is complete
✅ Benefits #
-
Instant access to all lead information
-
Easy, real-time editing
-
Better coordination through internal notes
-
Accurate sales stage management and next-step planning
📌 If the lead is linked to a patient form, data like language, country, and contact info auto-fill into this page.
Add Patient #
In NexaPortal, each lead can be connected to a patient profile.
This connection helps the sales manager centralize patient data and prevents duplicate entries in the system.

🧩 How to Connect a Patient to the Lead? #
At the top of the lead form, click the “Add Patient” button.
A pop-up window will allow you to either create a new patient or edit an existing one.
📝 Required Patient Info Form #
| Field | Description |
|---|---|
| Username | Unique system username (letters & numbers only) |
| First/Last Name | Full name of the patient |
| (Optional) but useful for communication | |
| Mobile (Default) | Main contact number (required) |
| Additional Phones | Add more contact numbers if needed |
🌍 Additional Patient Info #
This section includes more detailed data for better communication and commission handling:
-
Default Language
-
Additional Languages
-
Country of Residence
-
Commission Type (Fixed or Percentage)
-
Commission Amount
-
Gender
✨ These details are especially useful for support teams, translators, finance, and reporting systems.
✅ Important Notes
-
If a patient with the same phone number already exists, the system allows linking to the existing profile.
-
If new information is entered, a new patient profile is created automatically.
-
All entered details will be stored in the patient profile and accessible throughout the system (e.g., finance, services, chats).


